A Faucet Aerator clog can cause weak and uneven water flow. Discover a simple and effective way to clean your aerator at home and restore strong water pressure!
What Is a Faucet Aerator?
Most kitchen and bathroom faucets have an aerator, a small device that mixes air into the water stream. This helps reduce splashing, improve water efficiency, and create a smooth flow. However, over time, mineral deposits and debris can clog the aerator, restricting water flow.
When this happens, removing and cleaning the aerator is the best solution. Below is a step-by-step guide to help you clean it effectively.
Tools and Materials Needed:
Project Overview:
- Working time: 15 minutes
- Total time: 45 minutes
- Skill level: Beginner
- Estimated cost: $0 – $45
Step-by-Step Guide to Cleaning a Faucet Aerator
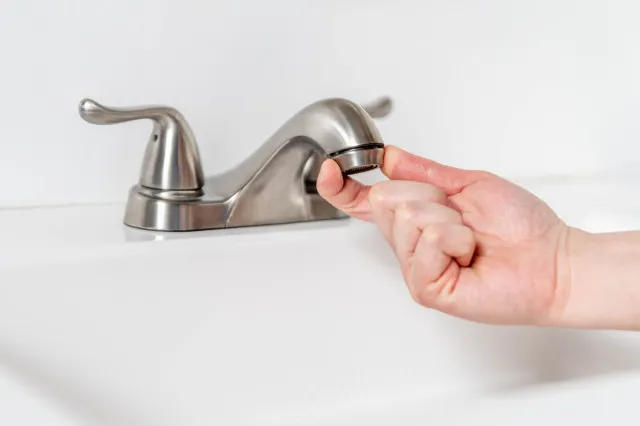
Step 1: Remove the Aerator from the Faucet
The aerator is located at the tip of the faucet. Try unscrewing it by hand by turning it clockwise. If it doesn’t budge, use pliers to loosen it gently.
To avoid scratching the aerator, wrap it with masking tape before using pliers. If your faucet has a hidden aerator, use a faucet aerator key wrench to remove it.
If the aerator is stuck due to mineral buildup, fill a plastic bag with white vinegar, tie it around the faucet, and let it soak for 30 minutes before trying again.
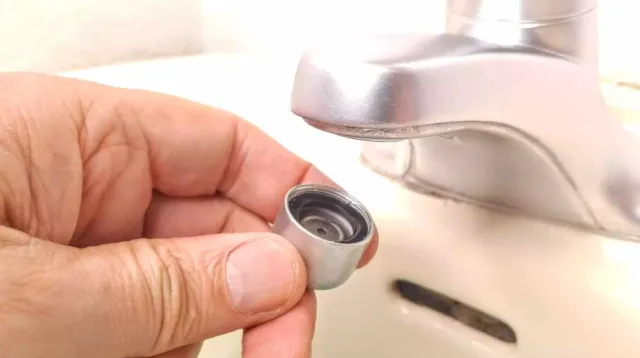
Step 2: Inspect and Disassemble the Aerator
Once removed, check for any debris or limescale buildup inside the aerator. Use a small screwdriver or your fingers to gently scrape off any stuck particles.
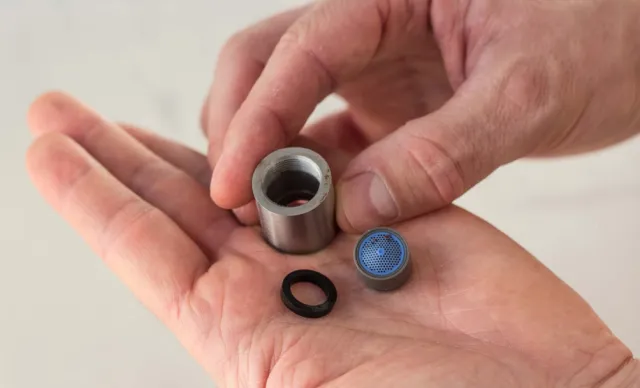
Most aerators consist of:
- Outer housing
- Fine mesh screen
- Rubber washer
- Flow restrictor
- Mixing disc
Take pictures before disassembling the parts so you can reassemble them correctly. Use a toothpick to clear out any debris from the screen holes and threads.
Step 3: Rinse and Soak in White Vinegar
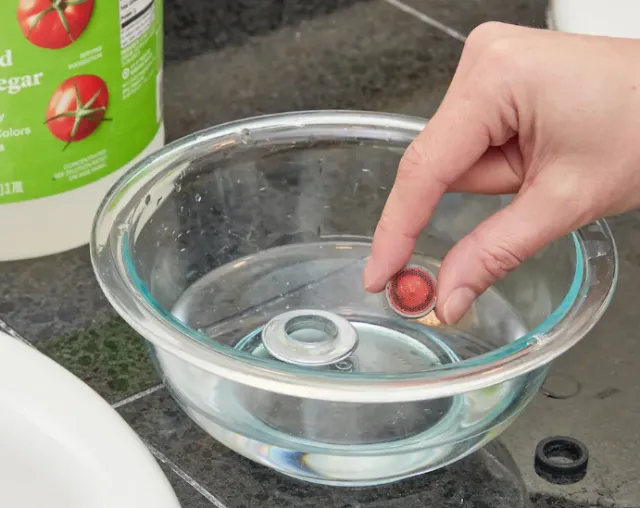
Rinse each aerator piece under running water. If any part is damaged, replacing the entire aerator is recommended.
To dissolve stubborn residue, fill a small bowl with white vinegar and fully submerge the aerator components. Let them soak for 20–30 minutes.
Step 4: Scrub the Aerator with a Toothbrush
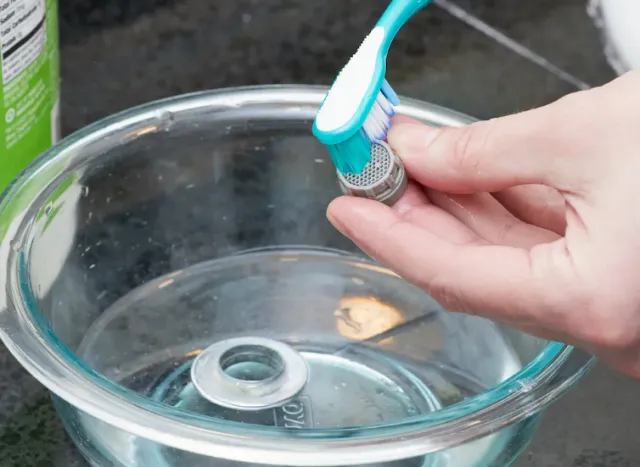
After soaking, most grime should be loosened. Use an old toothbrush to scrub each piece thoroughly.
Hold the screen up to the light to check for remaining debris. The toothbrush’s bristles can reach small crevices, helping remove any remaining particles. Work carefully to avoid damaging the parts.
Step 5: Rinse, Reassemble, and Reinstall the Aerator
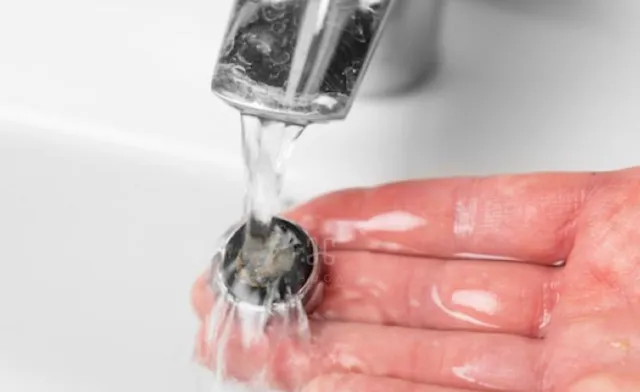
Rinse all parts thoroughly under the faucet. Use your reference photos to reassemble the aerator in the correct order.
Carefully screw the aerator back onto the faucet by turning it counterclockwise. Turn on the water to test the flow. If water sprays from the sides, tighten the aerator further using a wrench.
Important Maintenance Tips
- Regular Cleaning: Clean your faucet aerator at least twice a year to prevent clogging.
- More Frequent Cleaning Needed If: There has been plumbing work or water line repairs in your area.
- Replace When Necessary: If the aerator is damaged or worn out, replace it rather than trying to repair it.
Final Thoughts
Cleaning a faucet aerator is an easy and inexpensive task that takes less than one hour. Regular maintenance ensures proper water flow and extends the faucet’s lifespan. If a replacement is needed, bring the old aerator to the store to find a compatible match.